Hello everyone!
I am back with a tutorial I did for Copic Marker Europe, a simple but colourful winter scene in Copics!
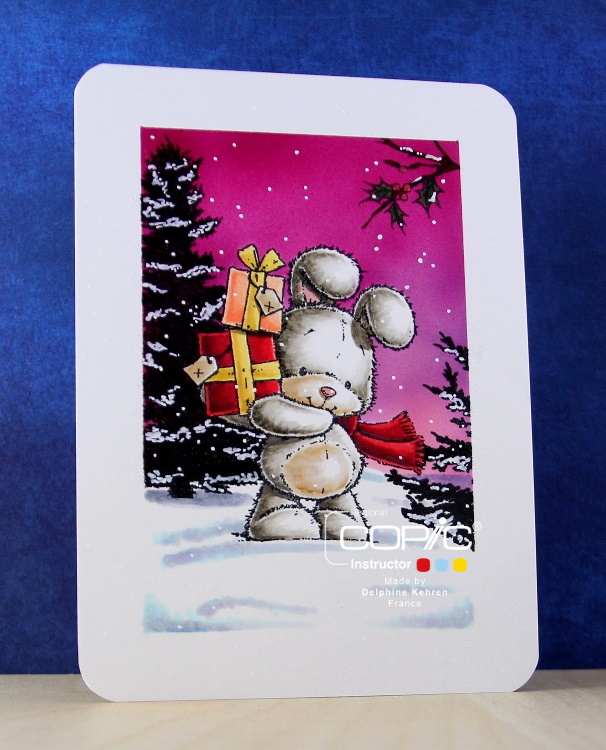
For my card, I used a bristol haïku card by SMLT and Penny Black stamps – the main image is called Hopping By, the tree comes from the Woodland Beauty set and the branch from the Peaceful set – my Copics and airbrush.
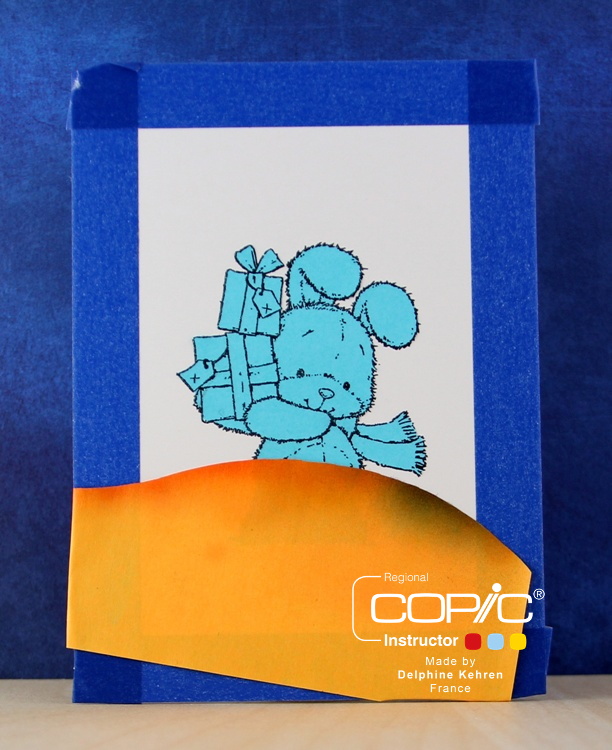
Step 1: I prepared my card for airbrushing. I stamped my rabbit in Memento Ink on my SMLT bristol card, covered it with a blue mask, covered the edges of my card with washi tape and added a hill.
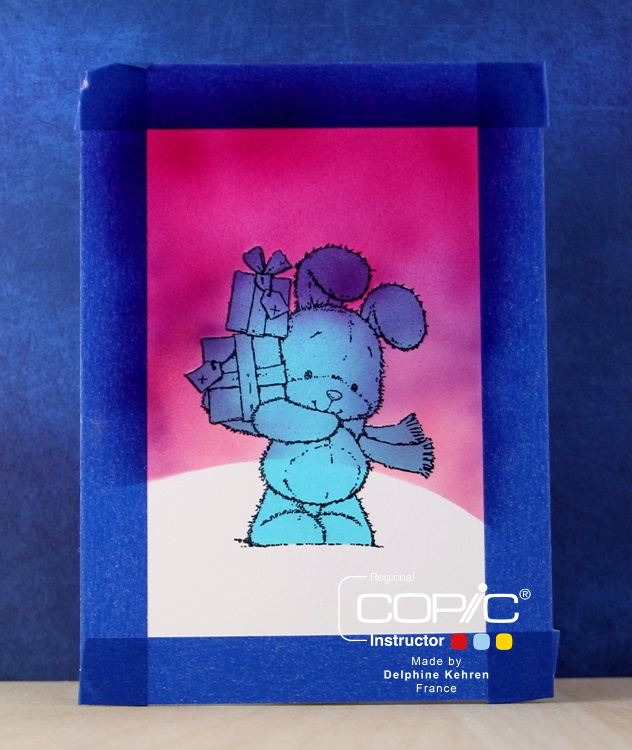
Step 2: I airbrushed my background, using RV66, RV55, V15 and RV11 (from top to bottom).
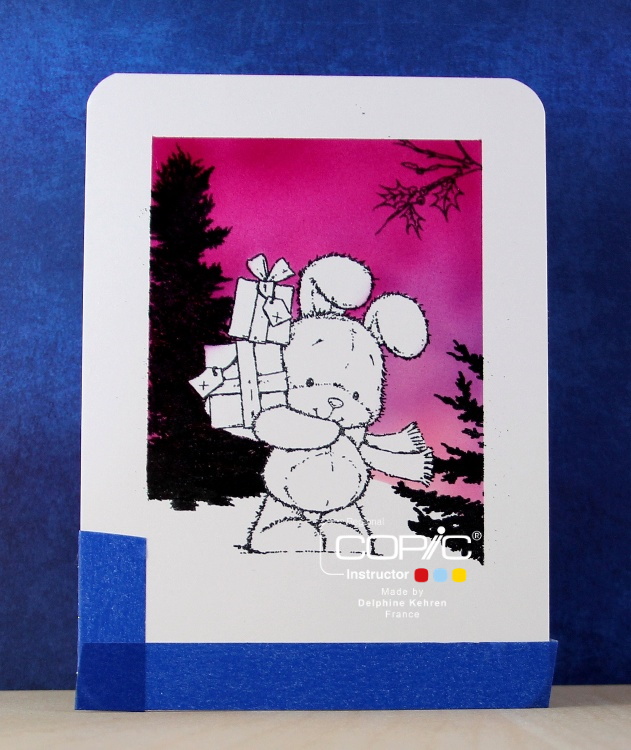
Step 3: I stamped trees and a branch to add a bit of interest to my background – I left my masks on my image, just removed them for the photo ;).

Step 4: I then coloured my main image, the rabbit, in Copics (see detailed list below).
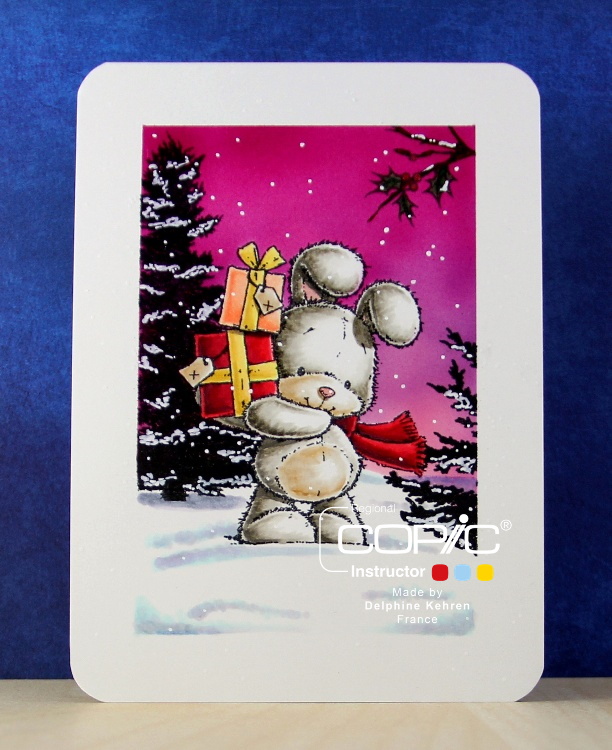
Step 5: I added all the details that can make a difference 🙂 I coloured the snow in Copics and added white acrylic paint to my trees and for snowflakes. Here is a close up of my image and all the products and Copics I used:

Stamps: Hopping By, Woodland Beauty and Peaceful – Penny Black
Colouring: Copic on SMLT Bristol Haïku Card
Other: airbrush, white acrylic paint marker
Delphine xx